With the attention span of humans decreasing to 8 seconds, designs play a crucial role in engaging the audience.
In fact, visuals are 40% more impactful than plain text.
That said, Canva is one of the most powerful tools in the industry that makes designing super easy for both beginners and professionals.
But is it for you? Or should you switch to Canva’s alternatives?
To help you make the right decision we have got you this review that delves deep into Canvas features, pricing, and more.
Why us?
It’s because we’ve spent time exploring every nook and cranny of Canva, gone through troubles, and resolved them so that you don’t have to.
No more ado’s! Time to get straight to the review.
What is Canva?
Before writing this review, we did go through a few reviews on the Internet about Canva.
On these websites, the most obvious description of Canva is that it’s a Drag and Drop tool.
We think it’s a half-truth.
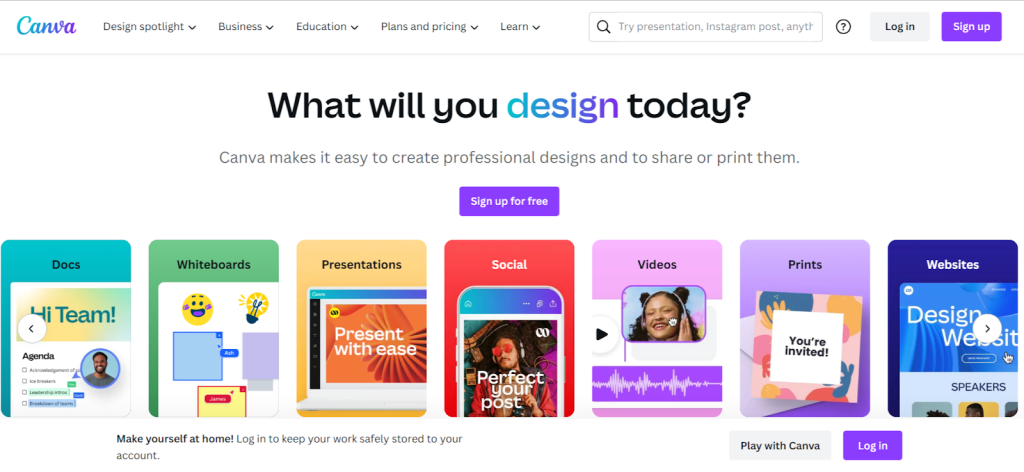
While Canva has tons of templates, tools, etc. to make your job easier, it’s definitely not just any drag-and-drop tool.
Those who have used Canva for a while know what we are talking about.
That said, Canva is definitely a tool for non-designers looking to design a few basic to moderate-level posts, presentations, etc.
It saves your time and energy while giving you the best result possible.
How does Canva Work?
Canva has done a commendable job on its sign-up process.
It takes a few seconds or a minute at maximum to complete the signup.
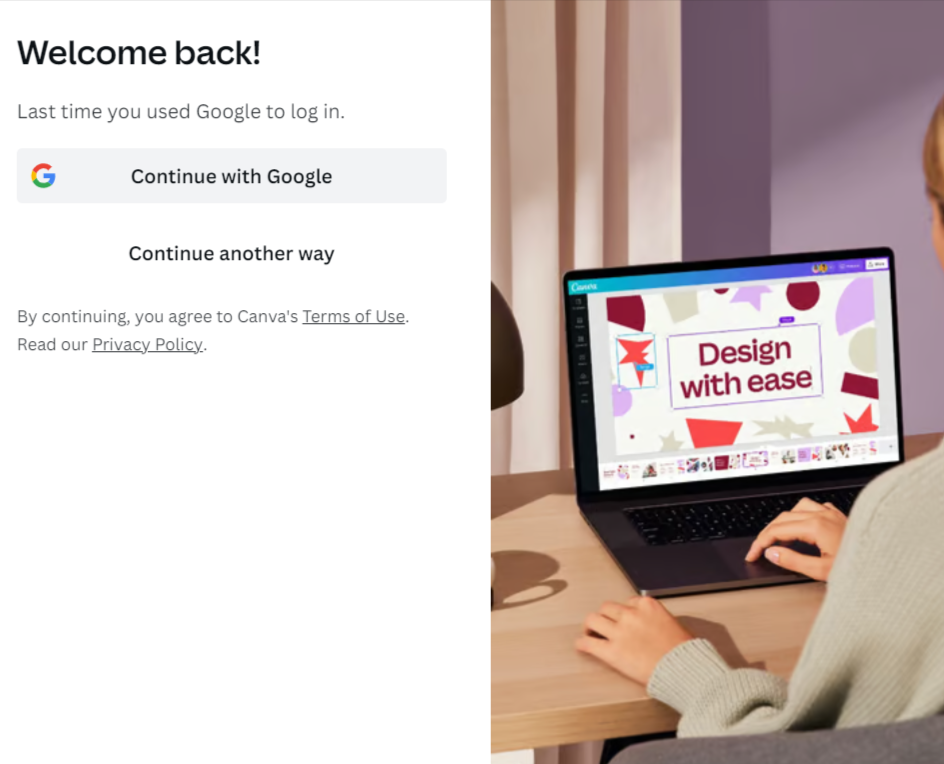
Once you are at the Canva Home Page, in the top right corner there’s a signup option.
Click on it and fill up the details.
What next?
One final step, choose your plan and proceed to checkout.
This is where the confusion strikes.
Which plan should I choose?
What are the features?
Can I even use Canva?
Well to answer those queries we have got you this detailed review.
Hop on to find out every detail on Canva.
The First Look
The moment you sign into Canva, you will land at a very simple and elegant dashboard, quite soothing to the eyes.
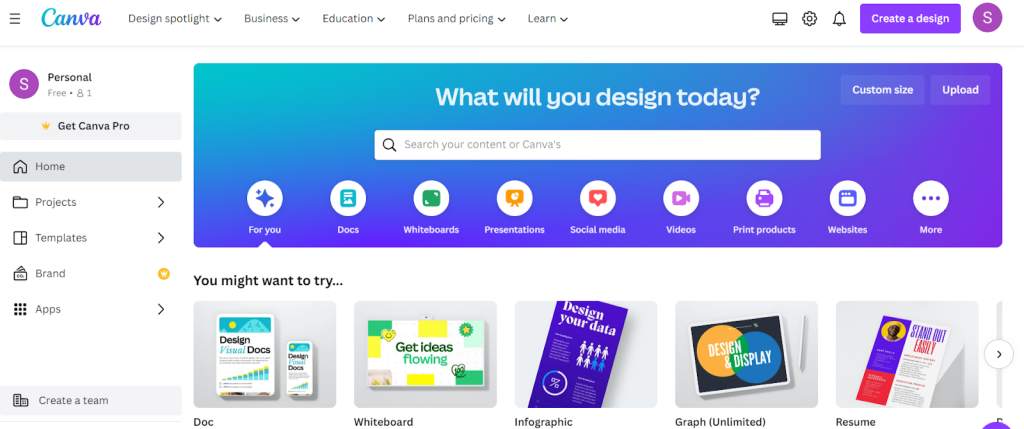
On the top left side, there is a drop-down menu where you can choose your designs, select plans, and access their resources.
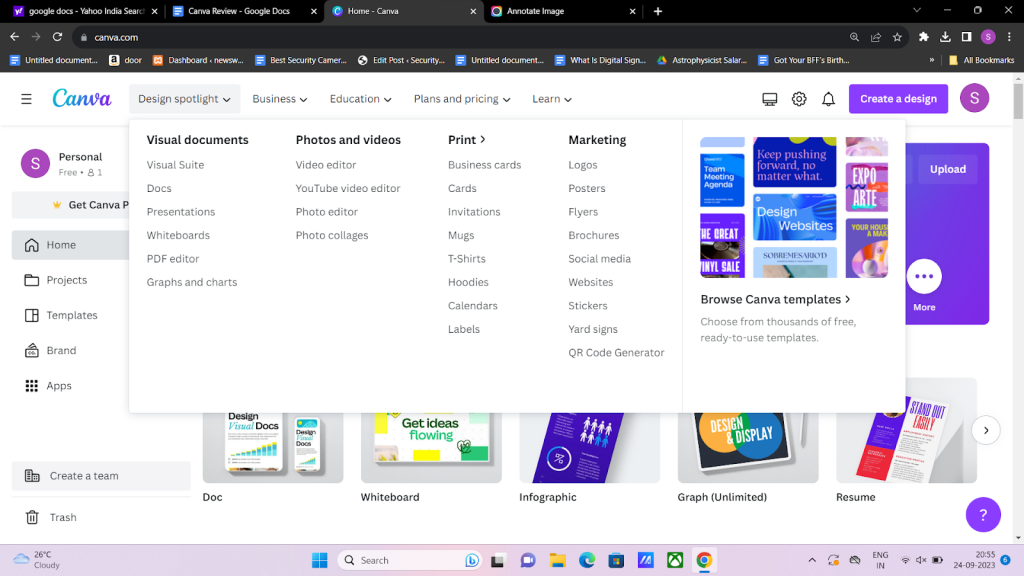
To the right of the top, you have a few simple options like notifications, settings, etc.
One thing that’s really useful is the create design option. You can customize your canvas with this feature.
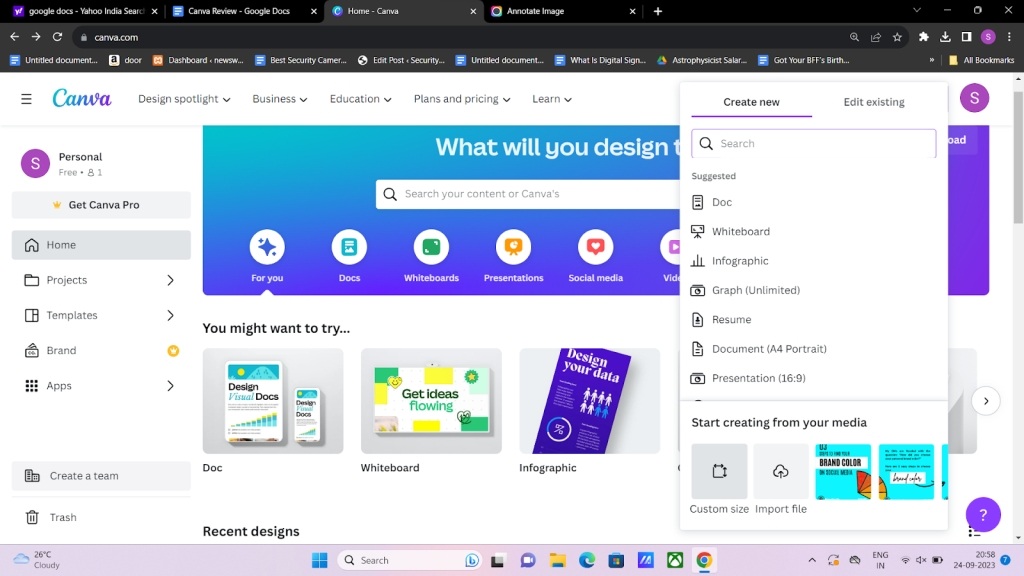
We find it extremely useful for designing seamless carousels.
Users can also access different predefined templates by choosing the type of posts they want from the options.
But, there’s an easier way to do it.
Instead of selecting the Create Design option, you can directly search it in the Search panel placed at the center.

Not just that, Canva offers easy access to all your projects and previously designed graphics.

On the left side of the main dashboard, you can select your previously saved projects to create teams for your business.
Features Inside Your Canva Design
Okay, you have now selected the type of design you want to create.
Let’s say an Instagram post.
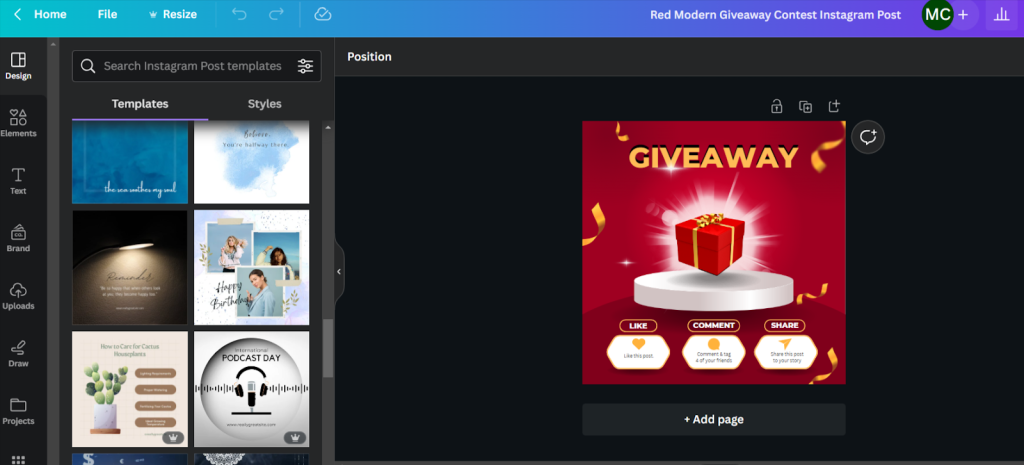
There are few features on Canva that are common for all types of designs whether its social media posts, infographics, documents etc.
We will have an overview of those features to the left of your dashboard in detail.
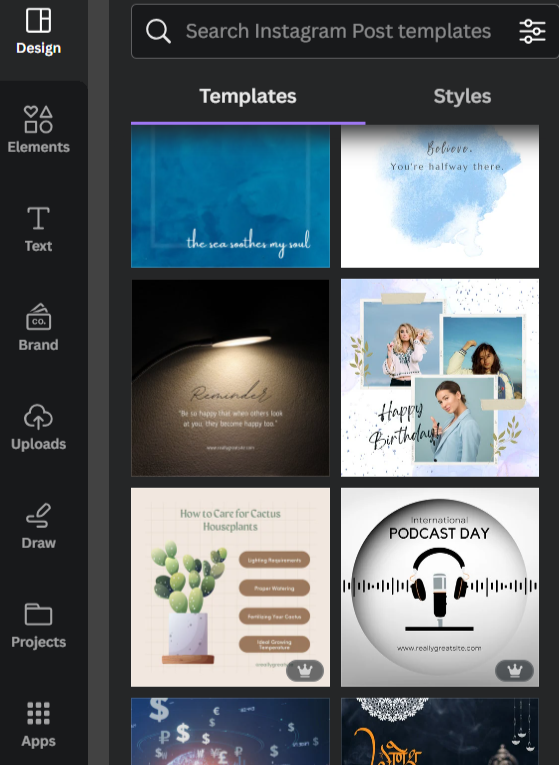
The first tool to the left is “Design” where you can select templates for your work.
Let’s say you have a design but want to add a different style to it.
You can select a particular template, take elements used in it, and customise your template.
Apart from that if you are designing a carousel or presentation,
You can combine the slides from two different presentations all together to make a ppt that suits your requirements.
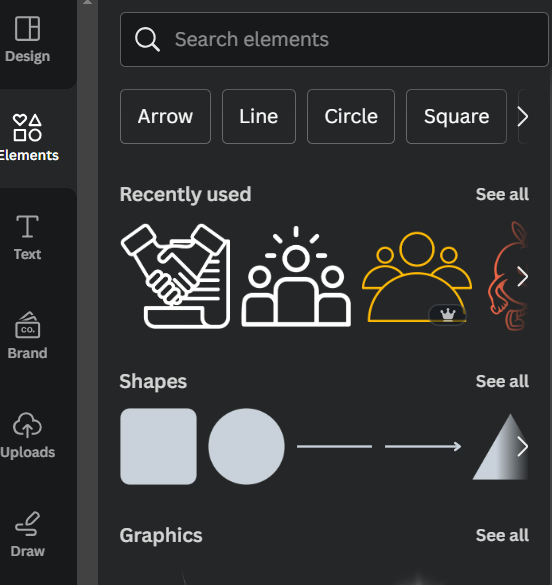
The next tool common for all design types is Elements. This section has a group of pre-designed graphics that you can use on your designs.
For example, if you want to add an announcement element to your Giveaway post.
Search announcement on the search bar.
In a second you will have graphics, photos, videos and audios related to your search term.
What is even more awesome?
Canva suggests a few other related terms to your initial search. So if you don’t find a good design here, you can click on those related terms to get the graphic you want.
Simple.
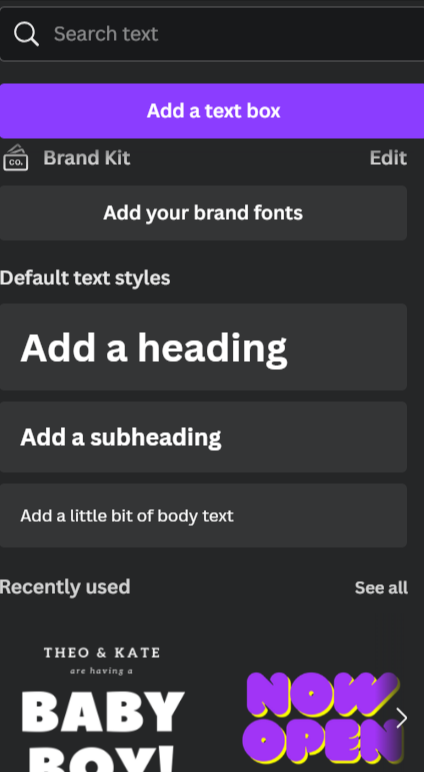
Coming to the next tool we have text.
This is one of the best tools by Canva actually.
Why?
Because it’s so unique, and no other designing platform has a separate section for Fonts and animated texts.
This makes the entire process smooth like butter.
What’s more?
Canva allows users to add their Text Box with a click. You don’t have to drag and drop the text box anymore.
It doesn’t end at Text.
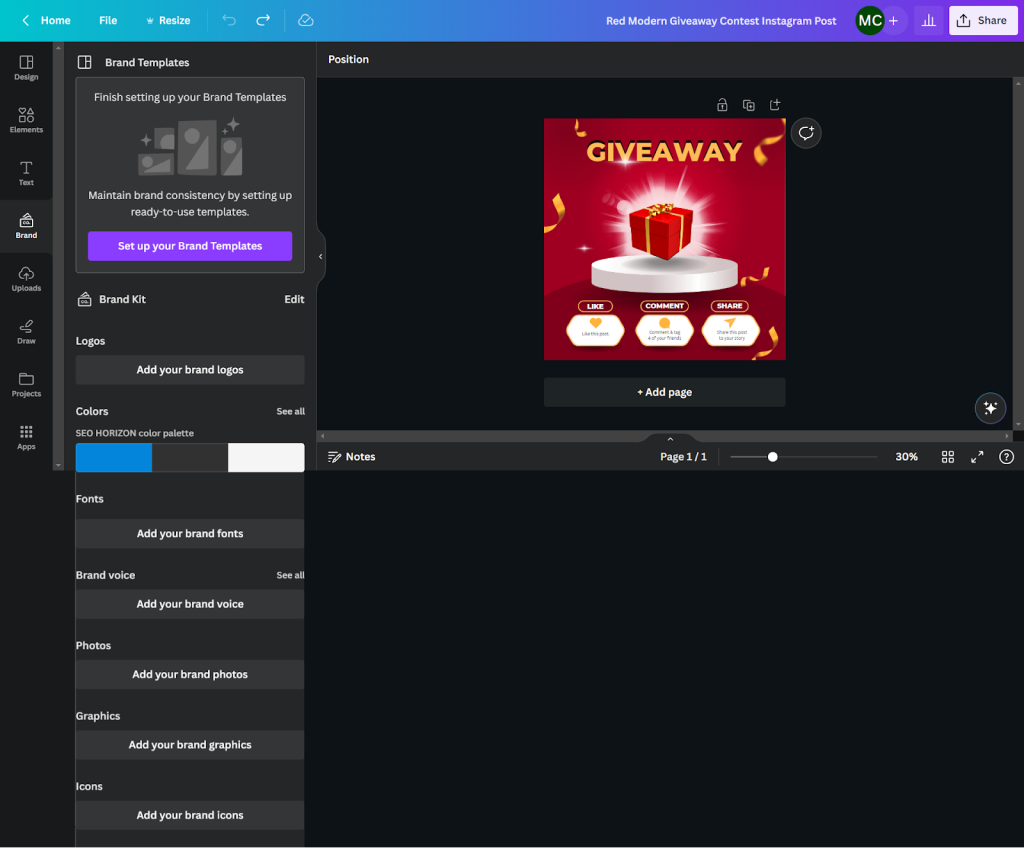
Brands have their own logo, brand colour and style. Canva is determined to ensure all their designs maintain the same.
To make it easier, you will find the Brand tool to which brands can add their logo, colour pallet, fonts, brand voice, photos and much more.
It might seem pretty basic, but trust us, if you are a brand, you will need it more than you can imagine.

Finally, in the end, you will find Apps that have more than 100s apps to help you with your design.
Some of the best apps we have been using from this section are their AI writer and background remover.
We have reviewed each in detail later on this blog.
The only problem is that these apps are mostly for paid users and a few are accessible to free users.
Canva Editing Toolbar
The Canva editing toolbar is a collection of tools that offers easy access to tools that minimize designing complications.
You can access the Canva editing toolbar at the top of the visual design.

What’s impressive is that this toolbar dynamically adjusts its appearance based on the element you select in your design.
The Canva editing toolbar offers several editing options. Here are a few of them:
- Font Type: Every design needs a unique font that suits the information, contrasts the color, and brings in the magic. Canva has a collection of 50+ fonts, You can try, test, and choose the one you like.
- Font Alignment: Aligns text with precision, including letter and line spacing, bullet points, and numbering.
- Font Size: This helps you to adjust font sizes for your text.
Apart from that you can click on the three dots to access additional features like Underline, Animate, Position, Transparency, Link, and Copy, providing advanced customization.
The editing toolbar also allows you to edit images. This includes crop, flipping, animating, and modifying colors for image elements, enhancing the impact your design creates.
What’s truly impressive about the Canva editing toolbar is its adaptability and user-friendliness.
It provides quick access to the element you use most of the time, reducing clutter and confusion.
After all, Canva’s motive is to simplify the process as much as possible. That’s what they stand by and we would say they are doing pretty well.
Now that you know where and how to access stuff, let’s get straight to Canvas features on different plans.
Canvas Most Popular Features
Canva Background Remover Tool
Open your image in Canva on the desktop website, ensuring a clear subject-background distinction.
Many times you have to use a particular section of an image and not the entire image.
Or put the centerpiece of an image in a different background.
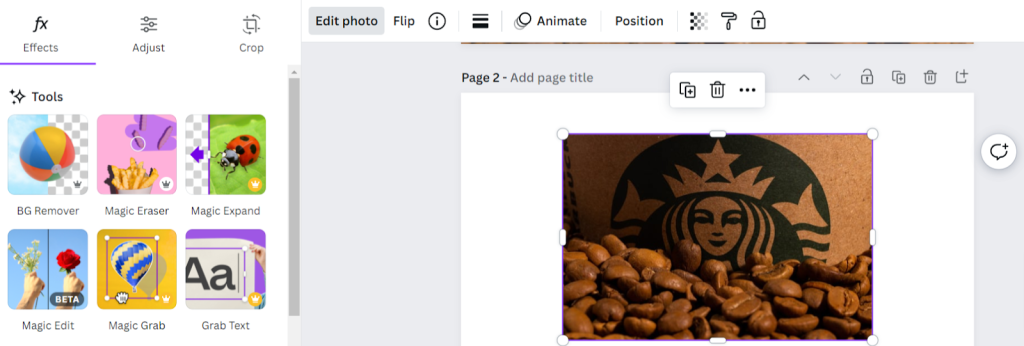
To make the process smooth, Canva has come up with its own Background remover tool.
Select the background remover tool from the app options.
There you can use the Eraser tool by clicking the Erase button (with a minus sign) and the Restore tool (with a plus sign) to adjust your image.
Here’s how the Background Remover Tool Works:
Step 1: Select the Image
Open your image on Canva, ensuring it has a clear distinction between the main subjects and the background to help Canva’s Background Remover work effectively.
Step 2: Select the Canva Background Remover Tool
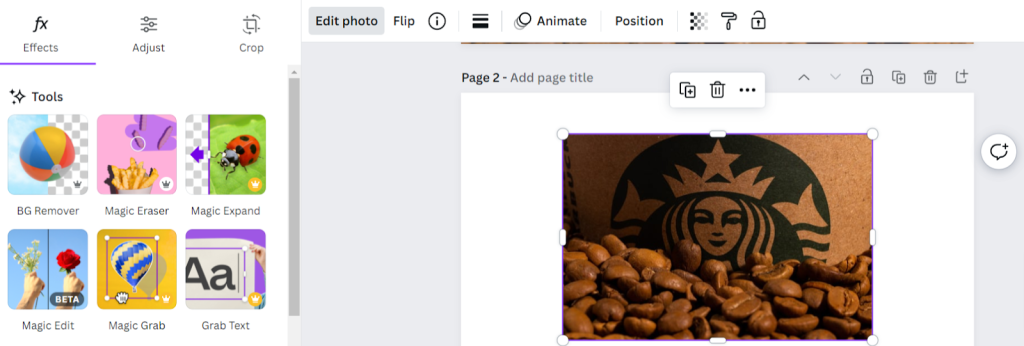
Click “Edit Image” in the top toolbar, then choose “Background Remover” from the left menu. Wait for Canva to automatically remove the background, leaving a transparent background.
Step 3: Restore and Erase
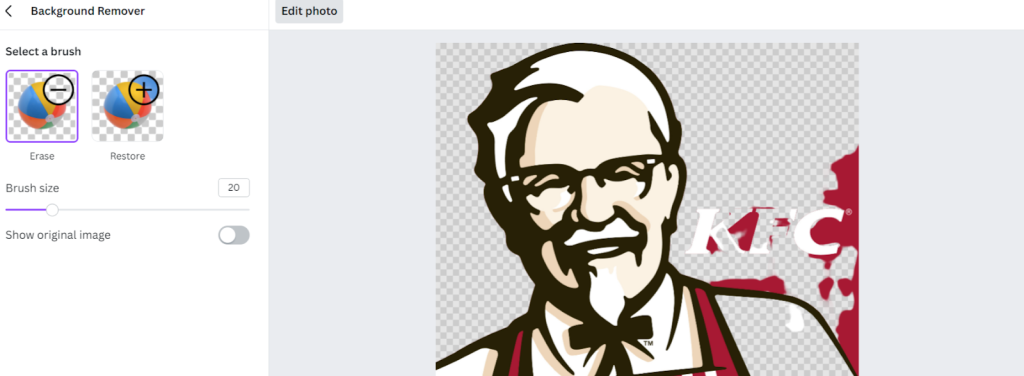
To remove unwanted areas, click “Erase” in the left menu, and use the circle cursor to erase parts of the image. To restore any accidentally removed parts, use the “Restore” brush.
Adjust brush size as needed. Toggle “Show original image” to compare. Click “Done” and then “Apply” to confirm your changes.
This tool is only available for Pro members.
Free users can consider the Canva Pro free trial to access the Background Remover tool and other premium features for a month.
Remember to cancel the trial within 30 days to avoid charges.
Canva AI writer
Canva’s Magic Write uses artificial intelligence (AI) to generate written content.
It offers a convenient way to create AI-generated text for different design requirements.
For example, if you are creating an Instagram post on “5 ways to cure acne”.
Instead of spending hours on Google, you can simply get the content directly on Canva and start designing.
The tool is available for both free and paid members, but the search limit for free users is only 25.
What’s disappointing is, the paid members have a search limit of 75 per month. We mean, that 75 searches won’t do an entire month’s social media post.
This is a great add-on to their collection of tools, but cannot be the primary reason to get the Pro version.
More to that, the content generated by AI won’t be that accurate or have a human touch to it, so it might bore your audiences.
Make sure you give it a nice crafty edit before sending it out to your audience.
To use Canva Magic Write, follow these simple steps:
- Open Canva and log in to your account.
- Create a new “doc” design in Canva, as Magic Write currently only works on doc designs.

- Click on Edit design option in the left side corner.
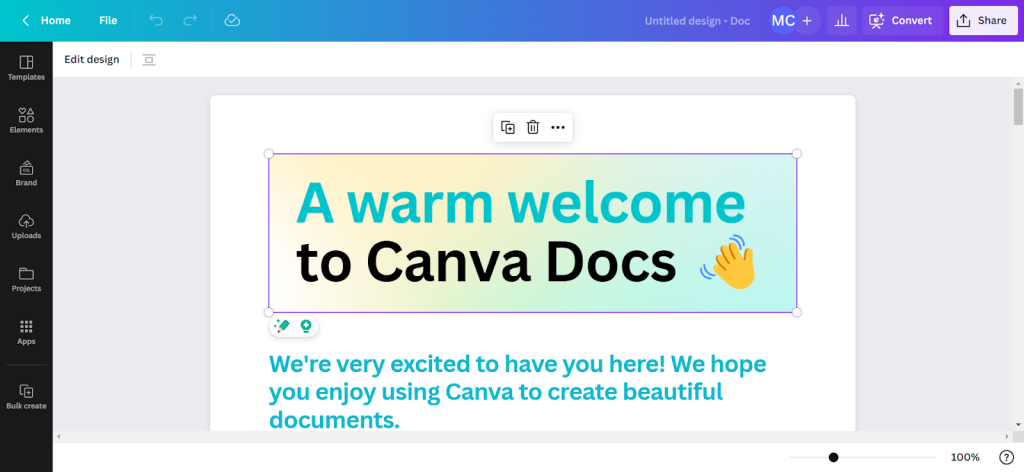
- Click the “Magic Write” sign to access available options.
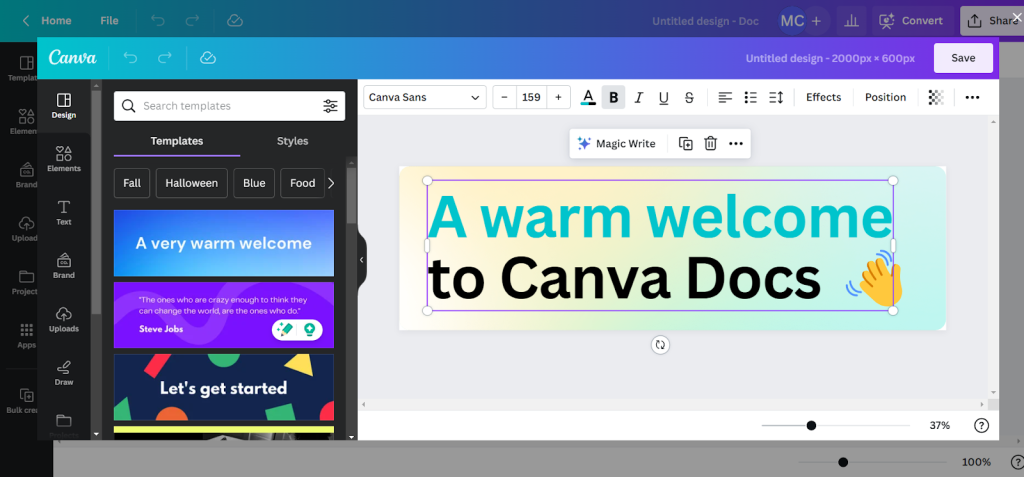
- Choose from the Dropdown and give your Prompt.
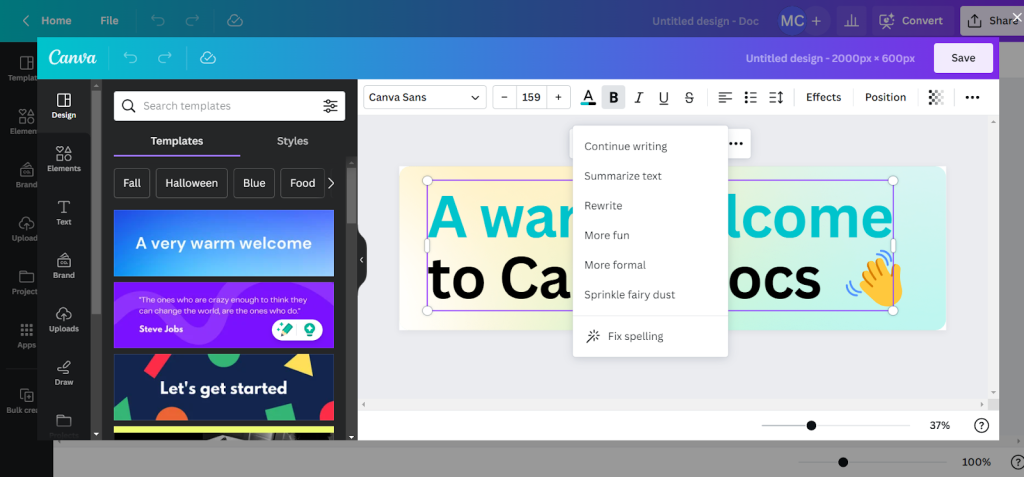
The prompt should be descriptive and at least 5+ words long (note that there’s a 200-word input limit).
That’s it, you will have your content in hand to start the designing ASAP.
Bulk Create
Canva’s Bulk Create is a new updated tool by Canva that streamlines the process of creating multiple graphics with consistent design elements but varying text or images.

It is a game-changer for designers, content creators, entrepreneurs, social media managers, bloggers, and anyone who has to create a large number of similar types of content with different text.
Why should you use Bulk Create at all?
Well for starters, it is time-saving and efficient.
You can create a variety of posts like testimonials, product promotions, key product feature highlights, inspirational messages, tips and tricks, and much more!
Okay, but how easy is it to use?
Allow us to show you the exact steps involved:
- Start with ChatGPT. Generate the content you wish to include in your designs. You can use it to generate ideas, quotes, facts, etc.
- Paste the content generated by ChatGPT into a spreadsheet program, such as Google Sheets or Microsoft Excel.
- If you find any piece of content not meeting your demands, remove them and tidy up your sheet.
- In the first row of your spreadsheet, label the columns to identify the type of content they contain, such as “QUOTES” or “FACTS.”
- Save your spreadsheet as a CSV (Comma-Separated Values) file. The CSV format allows structured data to be easily imported into other programs.
- Go to Canva and choose a design size. Create one design, you want for the type of content. If it’s a quote, customize a template for quotes with your brand color, logo, CTA, etc.
- Add Text Placeholders and select the Bulk Create app in Canva, upload your CSV file, and connect your data to the appropriate placeholders.
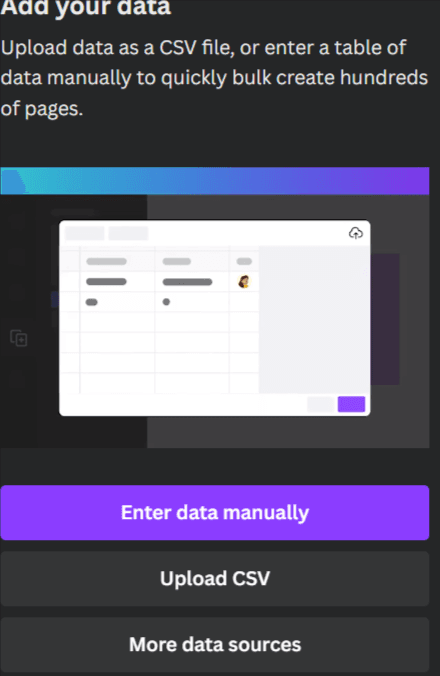
That’s it, you will have as many designs as you want. You can add, and remove elements to customize it.
Canva Smart MockUps
Canva changed its graphic designing footprint with the integration of Smart Mockups in 2021.
This incredible feature allows businesses and designers to effortlessly create realistic mockups for their products.
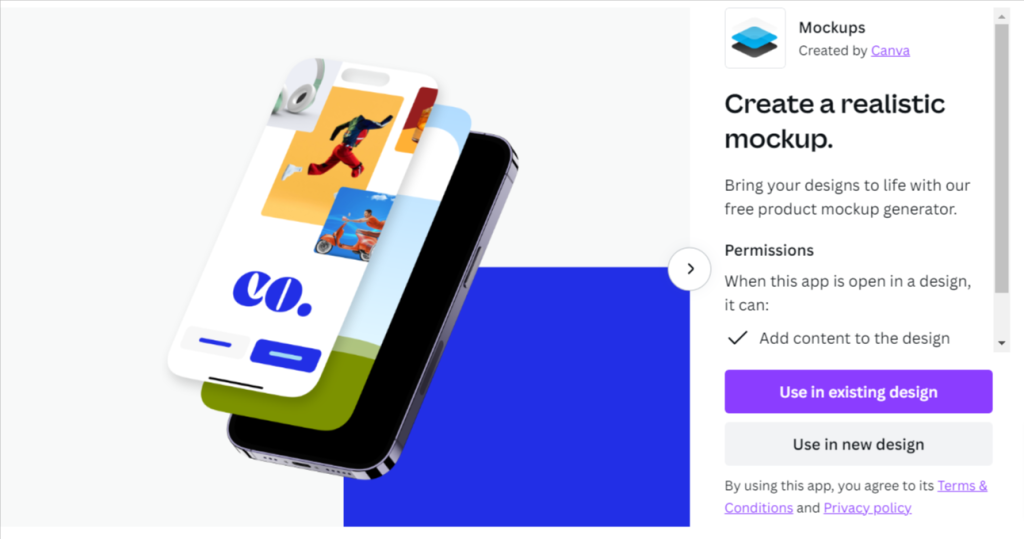
Now you can create artistic models or images of scenes to display your product in action.
What’s even better?
It’s available on both the free and paid versions of Canva.
Where to find this feature?
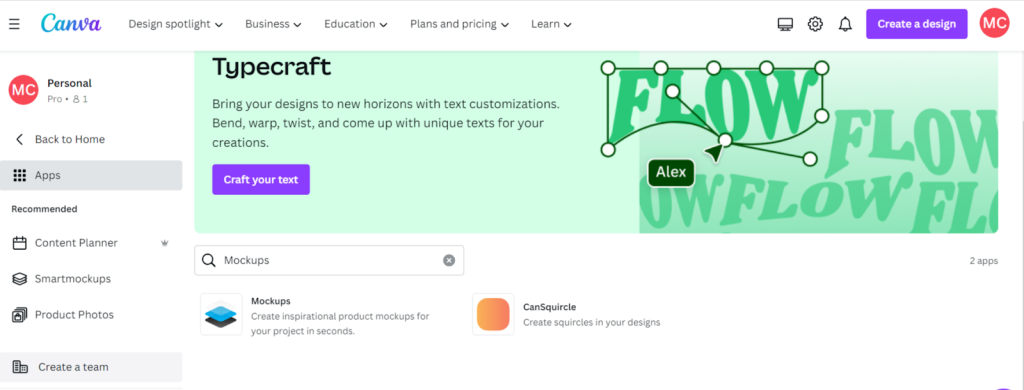
If you’re starting a new design, you can easily access Smart Mockups from the Canva App Directory.
- Simply hover over the ‘Feature’ tab on the homepage
- Click ‘See all’ under ‘Apps’
- Find Smart Mockups under the ‘Enhance your images’ section.
Otherwise, you can simply type in Smart Mockup in the search panel.
New to Smart Mockups?
Don’t worry!
We have got you covered with step by step process for creating a basic Smart Mockup:
- Step 1: Capture a screenshot of your website or social media page using your browser or mobile phone.
- Step 2: In Canva, upload your screenshot, select it, and click ‘Edit image.’ Scroll to find ‘Smart mockups’ and click on it.
- Step 3: Choose a smart mockup with laptop or desktop screens to show your website with an image.
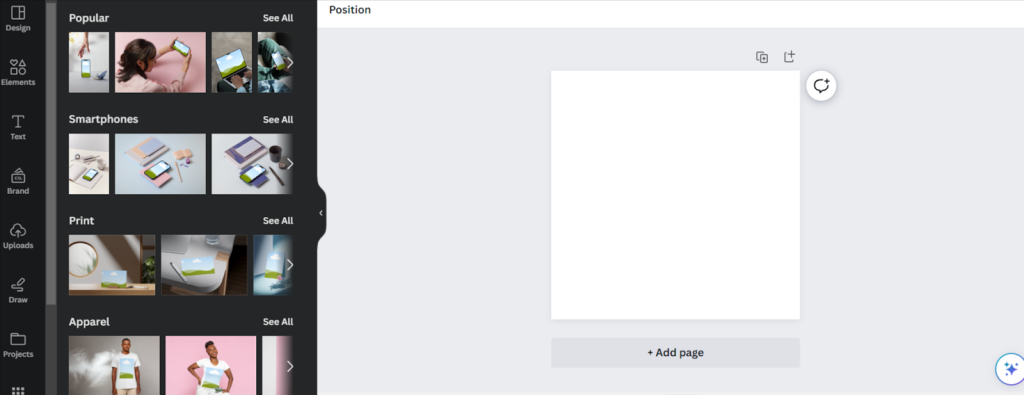
- Step 4: Similar to websites, use mobile phone screenshots for mockups with devices and no backgrounds. Get creative with designs or even add animations.
- Step 5: Canva currently supports product mockups for items like books, t-shirts, and mugs. Upload your image and click ‘Edit image,’ then select the desired product mockup.
- Step 6: Ensure your images have transparent backgrounds for seamless integration into mockups. Use the background remover tool if needed and customize the object’s color to match your branding.
- Step 7: Save your image and reload it in Canva with a new background.
- Step 8: Adjust the background to set your mockup apart from your competitors.
- Step 9: Get creative with Canva’s library of elements and images to customize your mockup.
That’s it. You are ready with your Mockup.
Although Smart Mockup is available in both premium and free accounts. Some of the other features mentioned in the steps above are only accessible in the pro account.
You either have to take their pro subscription to complete the steps or use other free tools online.
Canva’s Interface
After you log in, you can search in the search bar or choose from the icons below.
Once you do. There will be tons of templates as per your selection.
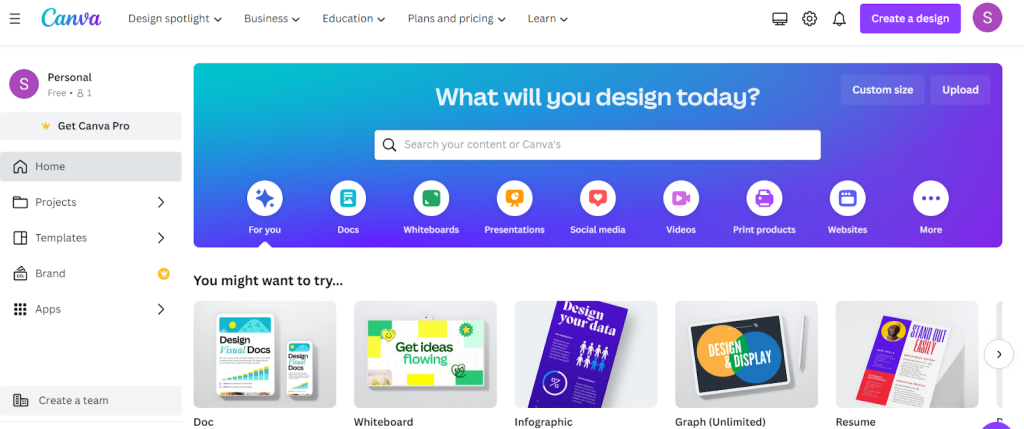
For example, if you choose Instagram, canvas will fetch you all the templates with canvas size:
From there it takes a bit of inner creativity and business knowledge to create the best-suited design.
It will take a couple of days to understand different features, once you do, there’s nothing better.
It strikes a balance between catering to beginners and offering depth for ambitious designers.
We were not expecting much from it’s mobile version.
We know how difficult it is to design on a phone, yet Canva did a good job compared to other designing tools.
It has a user-friendly interface but if you have an old model, you will face several issues.
We don’t recommend using it on your phone as the designing process will be time-consuming and you will miss out on a few features.
Canva’s Customer Support
Let’s talk about their response time first.
Canva categorizes its response time as per your plan. [Screenshot Below]

In our opinion, customer support should be handed to those based on their urgency and not the plan you purchase.
One with the Pro plan might face a bigger issue than that of the Team’s plan.
Anyways, let’s see how well their customer support reverts to mail.
We have had the pro plan for over a year and faced several issues.
In our experience, you can get help from the team for any technical issues you are facing on the website or your subscription like logging out frequently, subscription cancellation, etc.
However, don’t mail them with your design queries, cause then, their answer will confuse you more.
Their customer support teams aren’t designers, so if you have designing-related queries, YouTube is your best friend.

That said, they also offer support through ChatBot which can resolve your basic queries.
In short, Canva’s customer support is pretty average. There’s nothing impressive, or anything worse.
What do Canva Users have to say?
“As the person in charge of planning events at one of our locations, I frequently utilized it to make visuals for websites, social media, event handouts, etc. Being able to generate essentially anything I needed whenever I needed it was incredibly liberating and greatly aided my ability to complete my work.”
“Canva has been used by my company for two years. I use this software to make stories, presentations, short movies, social media postings, marketing templates, and other things. For those who wish to develop marketing materials but lack technical or design know-how, this is a perfect platform.”
“A product’s quality depends on the customer. This service, in my opinion, might present a phoney set of graphic design abilities. More often than not, when I look at anything, I assume Canva created it. Although the product that the advertisement is trying to sell isn’t mentioned, it’s a terrific advertisement for Canva.”
Canva Pricing
Free Plan
Price: $0 per month
Key Features:
- 250,000 free, customizable templates
- Over 100 design layouts
- Over 1 million free photos and graphics
- Collaboration with team members
- 5GB cloud storage
- Unlimited folders for organization
- Export to various file formats
Who Is It For?
Canva Free is perfect for anyone looking to create visual assets for online and print use without investing in design software. It suits beginners, entrepreneurs, or those with minimal design needs.
Pro Plan
Price: $14.99 per month or $119.99 per year (saving $60)
Extra Features Compared to the Free Plan:
- Premium stock photos, videos, and graphics (100 million+)
- 610,000+ templates
- Brand kits for consistent branding
- Magic Resize tool for easy content adaptation
- Magic Write tool (250 prompts/month) for AI-generated text
- Background remover
- Transparent background downloads
- Custom template design
- 1TB cloud storage
- Faster email support (within 24 hours)
Who is it for?
Canva Pro is designed for businesses and individuals who require access to a broader range of design resources and advanced tools. It’s ideal for entrepreneurs, marketers, content creators, and small to medium-sized businesses looking to elevate their visual content and branding.
Teams Plan
Price: Variable pricing based on the number of users
Extra Features Compared to the Pro Plan:
- Workflow management for approvals
- Template locking for brand consistency
- More brand features (up to 300 brand kits)
- Increased storage (1TB per team member)
- Single sign-on (SSO) integration
- Quicker priority customer support (within 2 hours)
Who Is It For?
Canva for Teams is tailored for businesses with multiple team members, agencies, or organizations that need strict brand adherence, workflow management, and advanced support.
What We Loved
- User-friendly with a gentle learning curve.
- Seamless sharing with team members.
- Direct sharing on social media platforms.
- Extensive design library with quality templates.
- Convenient sharing and downloading options.
- Cross-platform syncing and usability.
- You can save brand colors for brand consistency.
What We Didn’t Like
- Complex layer management system.
- They have several fonts, but some users still want advanced typography options which are not available.
- You can’t really customize much
- The content planner could be better.
- The mobile app doesn’t work as expected on old models.
- Lack of direct-to-print options.
- You cannot resize templates once you have selected a size and started designing.
Final Verdict
Canva’s versatility in creating a wide range of designs, from social media graphics to presentations is worth a try.
We can’t think of any better design tool that offers so many features at this pricing.
Yes, there are alternatives, but they cater to specific design needs only.
Canva is the powerhouse for all basic graphic designing.
The free version alone offers an impressive array of features, making it a cost-effective choice.
Yet, if you require advanced features or need to collaborate with a team, the Pro and Enterprise plans are competitively priced, offering even greater value.
However, it is not suitable for you if you are:
- Professional graphic designer
- Brands with complex design needs
- Need Advanced video editing
- Someone who aspires to learn the nuts and bolts of designing
Wait!
Don’t rush into making any decisions. Give the free version a shot and see if it fits into your requirements.
Canva Alternatives
Visme
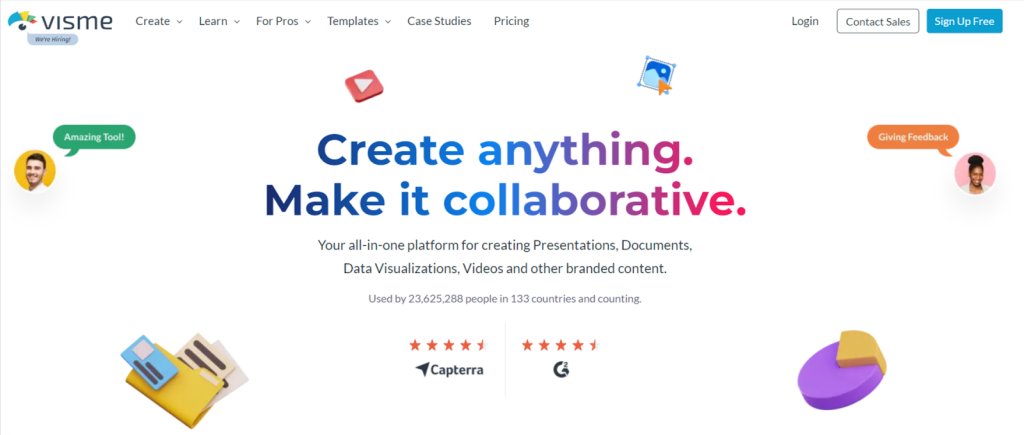
Yet another renowned drag-and-drop tool with everything a beginner needs to get started.
But, can it beat Canva?
Let’s have a quick showdown!
| Parameter | Visme | Canva |
| Templates | Over 900 | Over 420,000 |
| Data Visualization | Yes | Limited |
| Web Design | No | Yes, with limited functionality. |
| Exporting Formats | JPG, PNG, PDF, GIF, MP4, XLIFF, PPTX, HTML5 | JPG, PNG, PDF, GIF, SVG, PPTX, MP4 |
| Customer Support | Email and live chat with fast response times | Email support with varying response times as per the plan. |
| Mobile Apps | iOS app available | iOS and Android apps available |
| Pricing | Starts at $ 12.25 | Starts at $14.99 |
Vectornator
Vectornator is another designing software with tons of designing features and awesome customization options.
The best part?
It doesn’t cost a dime!
Add of course, no sneaky upgrade fees. You get the full deal right from the beginning.
Does it give Canva a cutthroat competition?
We are about to find out.
| Parameter | Vectornator | Canva |
| Design Purpose | Vector graphic design, illustrations, UI design | Versatile visual content creation, templates |
| User Base | Graphic designers, illustrators, professionals | Non-designers, small businesses, marketers |
| Templates | Fewer templates, focus on customization | Huge library of templates |
| Customization | Excellent customization options | Limited customization compared to Vectornator |
| Complex Design | Suitable for complex vector graphics and detail | Primarily for simpler designs |
| Offline/Online | Available offline (desktop), iPad app | Cloud-based, online platform with mobile apps |
| Collaboration | Not enough collaboration features | Real-time collaboration for teams |
| Pricing | Free on macOS and iPad | Free plan, Pro, and Enterprise paid plans, starting at $14.99 per month |
Adobe Express
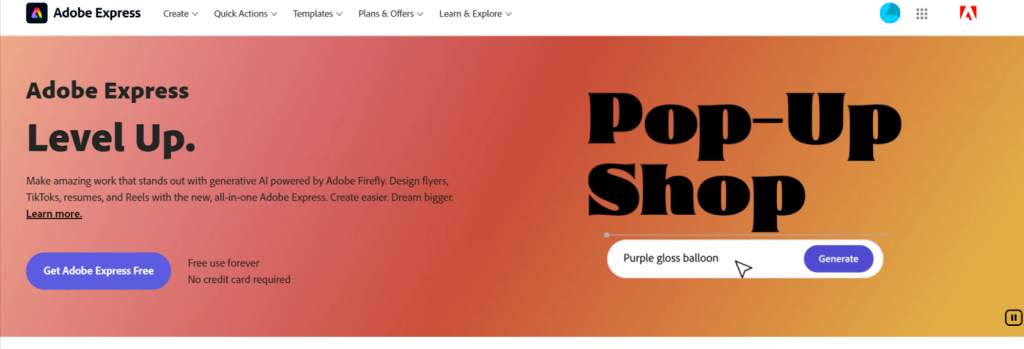
Earlier named Adobe Spark, this tool is one of the best alternatives for Canva Users who want a lot more customization.
Should you use this tool?
Let the comparison decide.
| Parameter | Adobe Express | Canva |
| Templates | Close to none | Extensive library with AI-powered elements |
| Effects and Filters | Manual adjustments, basic | Rich selection with AI-enhanced tools |
| Interface and Ease of Use | User-friendly, simple | Beginner-friendly, intuitive |
| Video Editing | Basic Features | Creation-focused with AI-powered features |
| Stock Photos | Adobe Stock, high-quality | Canva Library, diverse |
| Integrations | Limited integrations | Integration with various platforms |
| AI-Augmented Features | N/A | Magic Eraser, Beat Sync, and more |
| Pricing | Premium costs $9.99 per month. | Pro plan starts at $14.99 per month. |
Your questions, our answers
Are Canva Designs Copyright-Free?
If you’re using Canva for free, Pro Content, including templates and images, may have watermarks. You can remove these by purchasing a one-time Content licence for a single design.
Can I Share My Canva Designs?
Absolutely!
Canva makes it easy to collaborate.
Select the “ Share” button present above the editing toolbar. A link will be generated for your design.
Anyone with that link can edit your designs even without signing up.
Can I Cancel My Canva Subscription Anytime?
Yes, cancellation is super easy with Canva.
Upon cancellation, you won’t be charged for future billing cycles.
Once you cancel your subscription, your access to premium features ends then and there.
Will I Lose My Designs After Cancelling My Canva Subscription?
Your designs and work remain safe even after cancelling your Canva subscription.